Showing posts with label art. Show all posts

DIY Tripod Christmas Tree


      Today I noticed it was already the 3rd of December and after dealing with the inevitability of time constantly passing I thought to myself "should I do a tree this year or not?'

      Last year I bought a sad 2 foot tall, pre-lit tinsel tree at a dollar store and it was so dumb. The year before I tacked up string lights to the wall in the shape of a tree. That was much cooler, but man.... did I leave some holes in the wall. Sorry landlord.

      So for this year, I wanted something a little more grand, but that was still doable in our teeny apartment. Oh, and also cheap. Like dirt, cheap. Nothing says the holidays like being flat out broke.

      My solution at first was going to be to go out and buy dowels. But that requires money! Instead, I went outside and found sticks on the ground. For free!


      You obviously can use dowels if you want. And the length depends on the  height you want the tree to be. I wanted something decently tall, so these are about 6 feet long. 


      It's been raining here for the past few days so the sticks I found were yucky and damp. It you find nice dry, pretty sticks, you don't have to go to the troubling of whittling them unless you like that look. This took me a long time! But I wanted to get this done today, and I like the lighter wood underneath the bark. 


      I am no perfectionist, this is what I ended up with. I did some light sanding, but I'm sure with more effort I could have smoothed them down much more.
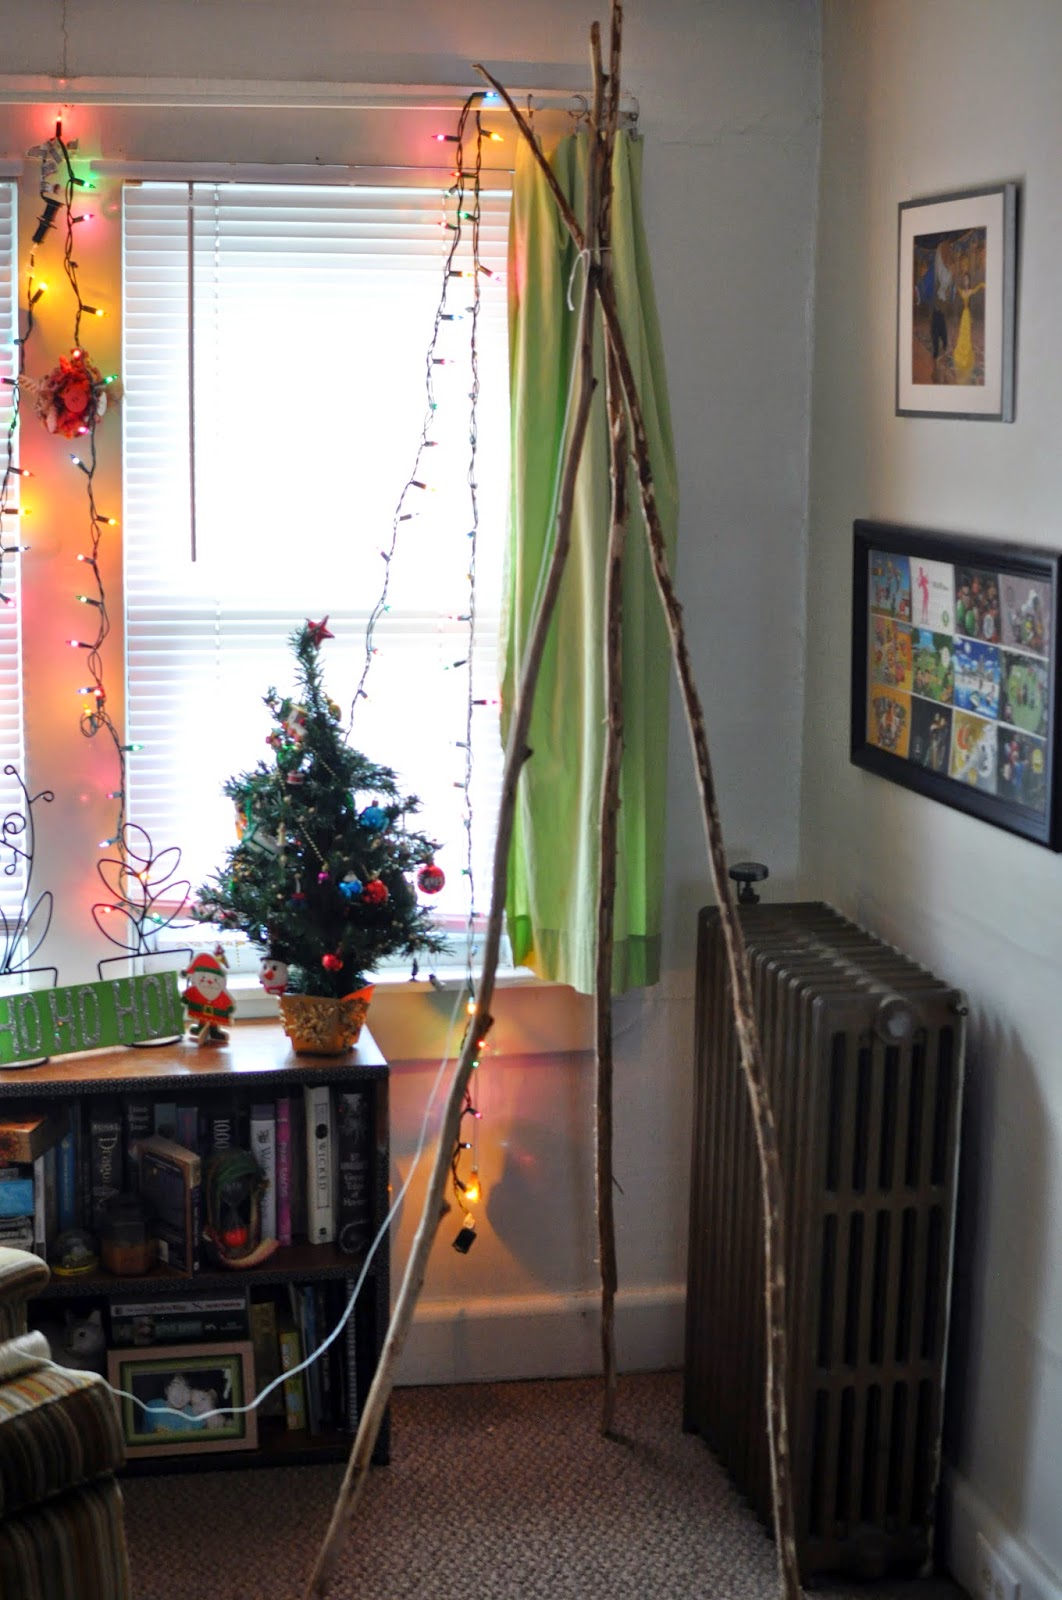

      Now you can choose your spot, and prop the sticks up against each other. Using some string, I then wrapped it around all three sticks at the top, and tied them together. 


Make sure to pull tight!


      Then I wrapped the string around, under, and over the sticks in varying ways. This will make it nice and sturdy. It might wobble a little bit, but as long as nothing is pushing or bumping into it, it won't fall down. 


Then I added a string of lights. I tucked in the end of the cord into the top of the tripod, and then wrapped it around, keeping to the outside. I tried to keep the lights taut, but don't pull too hard or you might collapse the tripod into itself. 


      Then you can really decorate it as you see fit! I stuck with a silver and gold motif since I used only white lights. A vintage string of pearls from my childhood also added to the metallic look. 


For a tree topper, I just made an origami paper star and hung it. 
I used this tutorial, here. 


So for a grand total of FREE (sticks were found, and everything else was on hand) I have an impressive little display. What I like most about this, is there's room for presents inside the tripod formation as well as around it. So more space saving for apartment dwellers!


      I guess it's a little more bohemian than the average christmas tree, but I think it'll suit us just fine this holiday. 


Wednesday, December 3, 2014

Sleepy Little Drawing

Just a little something I drew to get out my intense feelings I had for my bed this morning...


Monday, November 24, 2014

How to Frame Odd Things


      Have some cool things you'd like to get up and on display? 
But not everything is flat and angular amiright?
      Here are 2 things I've had lying around that I really love, but didn't have a way to showcase other than sitting them awkwardly on a shelf, or something to that extent. So here's what I came up with, and hopefully you can apply it with something you'd like to show the world! (erhmm or your hallway).


      Here's Tink. She's some sort of paper cutout. I'm really unsure what her exact purpose is supposed to be. A friend gave her to me because of my love of Disney (and my similarities to Tinkerbells hair style) and I loved it, but had no idea what to do with it. Since it's flat, it'll easily be framed. But sometimes just throwing something into a frame doesn't actually do the framed piece any good. It has real glitter on it, so that's what I wanted to accentuate. 


      So with that in mind, when I was frame shopping, I was looking for something that would bring out the coolest feature. You can do this with anything, just find the color or detail of what you're framing and look for a frame that will compliment it. It creates a more interesting piece as a whole. I was lucky to find an actual silver glitter frame. I could have also gone with plain silver, or diy'ed my own glitter frame with mod podge. 


      I also wanted to bring out the green of her dress, so rather than sticking with a white background, I cut some paper to the size of my frame opening, and did a light paint wash with some green paint mixed in with a cup of water. 


      And that's all! I'm a little torn on the background as I think it came out a little too bold, and distracts a little from Tink herself. But overall the silver glitter showing up on the main focus and the frame itself really makes it complete. 


      As for Batman he was a little more of a challenge. It's an old mask from one of my brother's Halloween costumes when he was a kid. So this thing might be over 20 years old! So it's 3-dimensional, and old and delicate. As you can see, it's got some cracking happening in multiple places. Obviously, I can't just sandwich this between some glass. 


      When selecting my frame, I chose a shadow box frame, which allows for much more depth. Even still, when put together, that glass pushed down on the nose in a way that smushed the whole mask. I ended up forgoing the glass, leaving the front open. It won't be as protected this way, but it's better than slowing ruining its shape over time with the pressure of the glass. 


      I wanted the background to use colors themed after the old batman color schemes. I choose yellow as the main color, and used the paper the frame came with to cut out some yellow paper the same size. Then I wanted to make a pattern. Originally I was searching for a batman logo stamp to use, but it was surprisingly hard to find. So I went with a simple polka dot pattern in purple. 


      To keep the mask attached to the paper, I used small amounts of elmer's glue on places the mask made contact with the paper. Some shadowboxes come with pins and a soft backboard you can stick the object to. 


      Now I have some great wall art, from things I already had. All I needed was some creative thinking, and the solution was pretty easy. Take a look around your place and see what you might be able to frame today!


Monday, November 17, 2014