Showing posts with label autumn. Show all posts

Quick & Easy Halloween Decor Tips

      Halloween is my absolute favorite holiday. So why did it take me half the month to finally decorate? I think with the colder weather my hibernation habits are kicking in. Sleeping in is my vice and I cannot kick it. Anyways, I didn't buy anything new this year, other than a hanging paper bat. So I tried being creative and walked around the apartment to try and come up with something. Here's the before of my stairway mantel. 


And here is the after. 


      Though I do have a box of Halloween goodies I can dig out every year, there are a bunch of things I added that weren't strictly  'Halloween items'.


      I scanned my bookshelf's for creepy looking covers and titles, found a good selection, and then stacked them according to size. If you're not like me, and don't have the beginnings of a personal library to work with, you can easily run to a thrift store and pick up some books on the cheap. 


      The David Bowie skull is a DIY I did just for fun earlier in the year, and decided he could share in the holiday spirt. DIY from A Beautiful Mess here.  
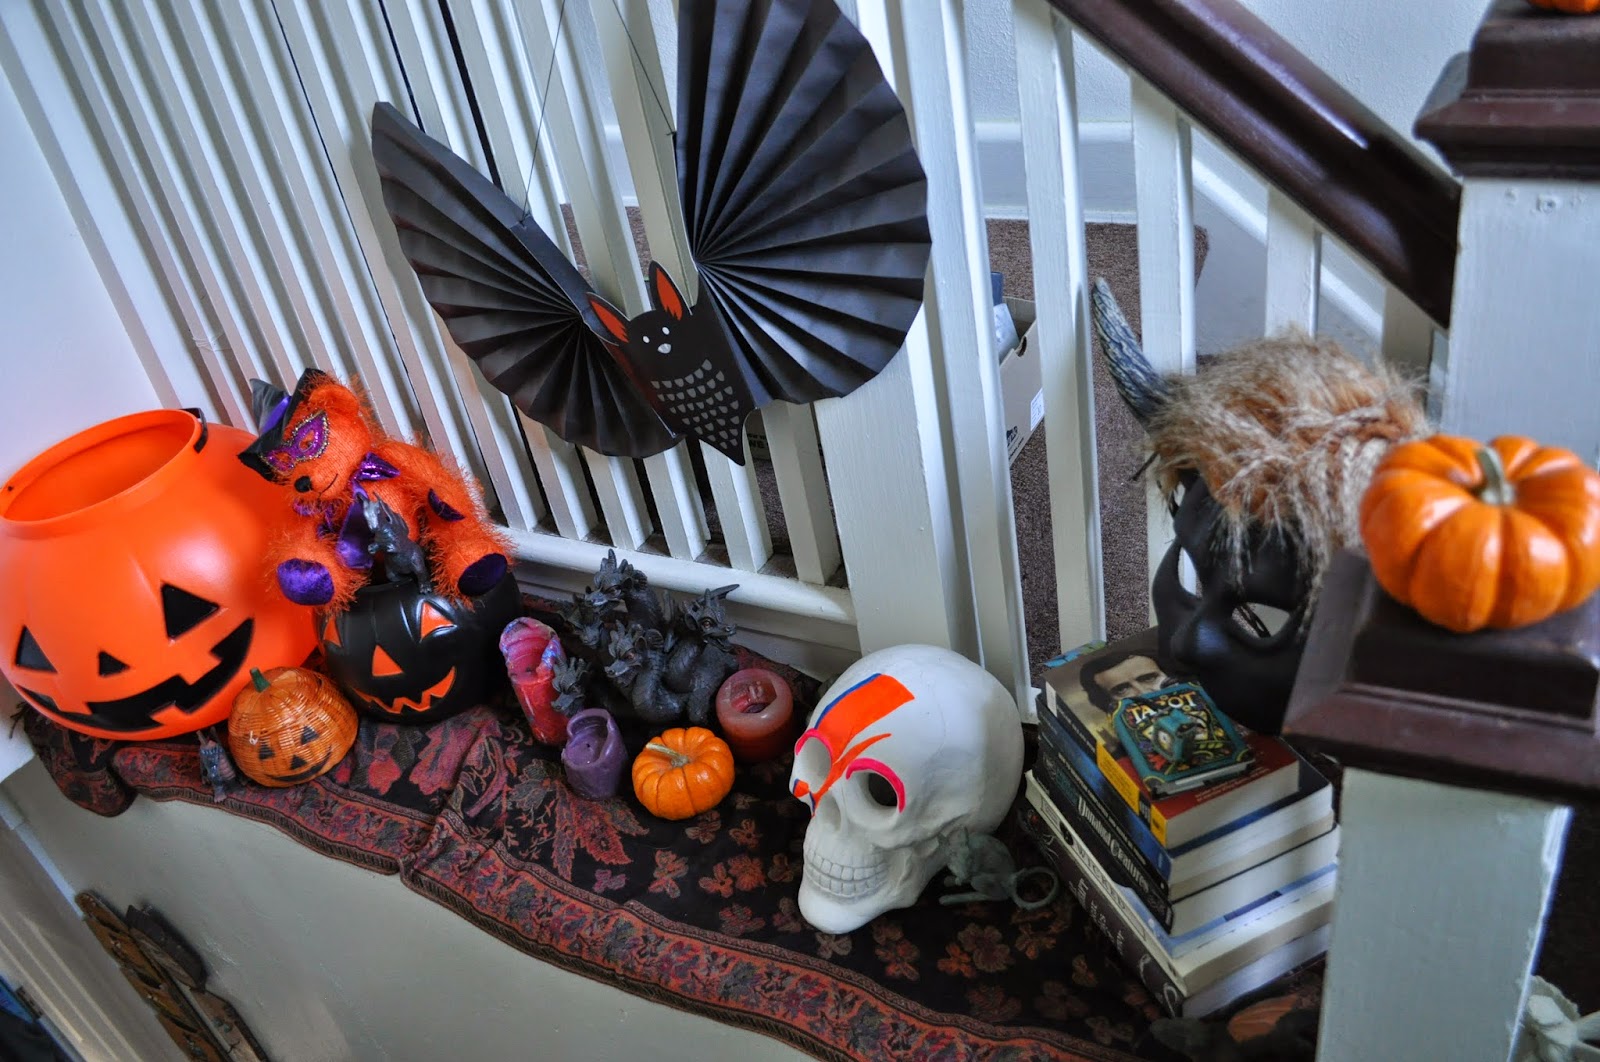

     The 5-headed dragon is an incense holder that was living on a bookshelf. After grabbing him, I also scattered some rubber dragons I had gotten for a photo project around the area. If you have some old melted candles, they can add a spooky mood to the setting, so don't chuck them, save them in your Halloween stash. The goblin mask was from a Halloween costume a few years ago. 


      That extra large pumpkin bucket is one of my favorite finds. He was at Target last year, but I didn't see them bring him back for this season. The sneaky mouse in the corner was also a bookshelf find. 


As for the rest of the stairwell/hallway, I filled it with the extra decorations in my stash, as well as some baby pumpkins. Those are a great, cheap way to fill in space and create a great autumn vibe. 


      If you have any great photos that fit the theme in anyway, nows the time to show them off. If you can, choose a frame that compliments a certain color found in the photo. 


      And don't forget the dollar store is a great place to score things. The vase and the black rose both came from there. And another Nightmare before Christmas character joins the other side of the windows. 


      That's what I managed to throw together this year. With more time and effort, I'd really go the extra mile and make my entire space feel spooky and festive. I'm sure we all feel that way. I hope this inspires any last minute decorations for those who need a little push! Happy Hauntings!


Tuesday, October 21, 2014

DIY Owl Chain (from TP rolls!)


      Way back when I was in college, I worked at an uptown art and glass store for a crazy lady. (I mean that in an endearing way of course). One time I was helping her sort through this huge box of vintage necklaces she had gotten a good deal on, but they were all super tangled. She was looking for all the ones that had an owl pendants. "Owls are going to be big" she claimed. Well flash forward a few years and of course, owls are everywhere! And somehow I've been roped in, and my apartment is covered in them. 

      Now I'm not claiming the idea of using TP rolls to make owls. I've seen it done before, but mostly as a project for little kids, just coloring them or jazzing them up. Here I tried to make a more involved project with a home decor type of result. 


You'll need:
Toliet Paper Rolls (I used 5)
Scissors
White Paint
Paint in the color of your choice
A foam brush (or a normal brush)
Scrap fabric or string/yarn
A paint marker

      The first thing you want to do is collect some rolls! Before you shape the ears, cut a nice size notch on opposite ends. This will help when you need to string the fabric through. Then fold down the sides, and shape them into pointy owl ears. 


      Then you want to paint the rolls white. This acts like a primer, and will help the color of your final paint really pop better. After they dry, paint the rolls in whatever color you like. I did 3 in a metallic silver, and 2 in a metallic gold. 


      I did some silly sketches just to prepare for drawing on the faces. Since I was using a Sharpie paint pen, I didn't want to blindly start drawing. I made a different face for each owl, but you can use the same face for them all. This is a very customizable project. :)


      After drawing on the faces, I went back over the lines a second time to help it stand out better. 

      Plan your attack with how you want the owls to line up, and how much space they'll have in between. I used an old curtain for my fabric, and just cut out one long strip. 


      Starting at the bottom owl, use a safety pin, or some kind of object to help reach the top of the owl through the bottom. You might have to open the folds a little bit to ease the fabric through. I used my fingers while doing this to keep the shape of the ears. Continue down the line until you reach the top owl. Tie a loop using the extra so you'll be able to hang the chain up. 


      Now hang those owls up! Originally I was aiming to hang this on a doorknob, but I made it too long, so I found a nice spot on the actual door itself. 


      It feels like owl themed stuff really gets popular in autumn, but owls are a year round thing around my place. So I'm sure these guys will hang around for awhile. Have fun with this easy project, you can totally change what material you use to chain them on, the color of the body and faces, and you could ever go horizontal and make a garland! Whatever your decision, I'm sure it will be a wise one. ;)


Sunday, September 28, 2014