
Sometimes shopping can be so frustrating. It happens so many times, I'll come across something I love and they're out of my size. Or I'll like it a lot, but there's just something about the design or cut that makes it enough not to buy it. Do you know what I mean? I also find every Disney movie except for my favorite has some sort of shirt out there. I know the Frozen bandwagon has come and gone, but I never saw a shirt I actually liked enough to purchase. So that's why I used Frozen for the words on this stenciled T-shirt. It have might been the sadder song to choose from... oh well!

To make a shirt with a stenciled letter design, you'll need:
A pre washed shirt.
Stencils (I used reusable plastic ones)
Fabric paint
A foam brush (a paint brush would work too)
Cardboard to put inside the shirt while painting (not pictured)

I also used a hair tie to gather up the excess fabric on the back of the shirt, after I had inserted the cardboard. This helped to keep the front nice and taut for applying the paint. Originally I was going for white letters, but thinking that might be too bright and harsh, I added some tan to get a nice cream color.

Before you start blindly painting on your shirt, grab some paper and plan your design. I originally was thinking about using the layout on the left, but my shirt is a little taller than that, so I came up with a more triangular layout to fill in the blank space better. Doing this really helps foresee how it will end up, so it's an important step.

Start laying out your stencils. I used some scrap paper to block out where the letters were going, and keep things centered. My stencil set only came with one of each letter, so I tried to use what I had to get at least the structure laid down. It worked out pretty well, except my 'A' ended up a little too far right, but not a huge problem.

Start painting! I held the stencil down with one hand, and dabbed on the paint with the foam brush. I only did single letters, not whole words, because the wet paint would have gotten smudged just moving on one letter to the next. So I did the letters I could, let dry, and came back to fill it all in. It took about 3 separate sessions. Also, these aren't perfectly sharp letters. Maybe if you used a different technique, or maybe a paint pen, they could be. But I like how they kind of have a weathered look so I didn't worry about it.
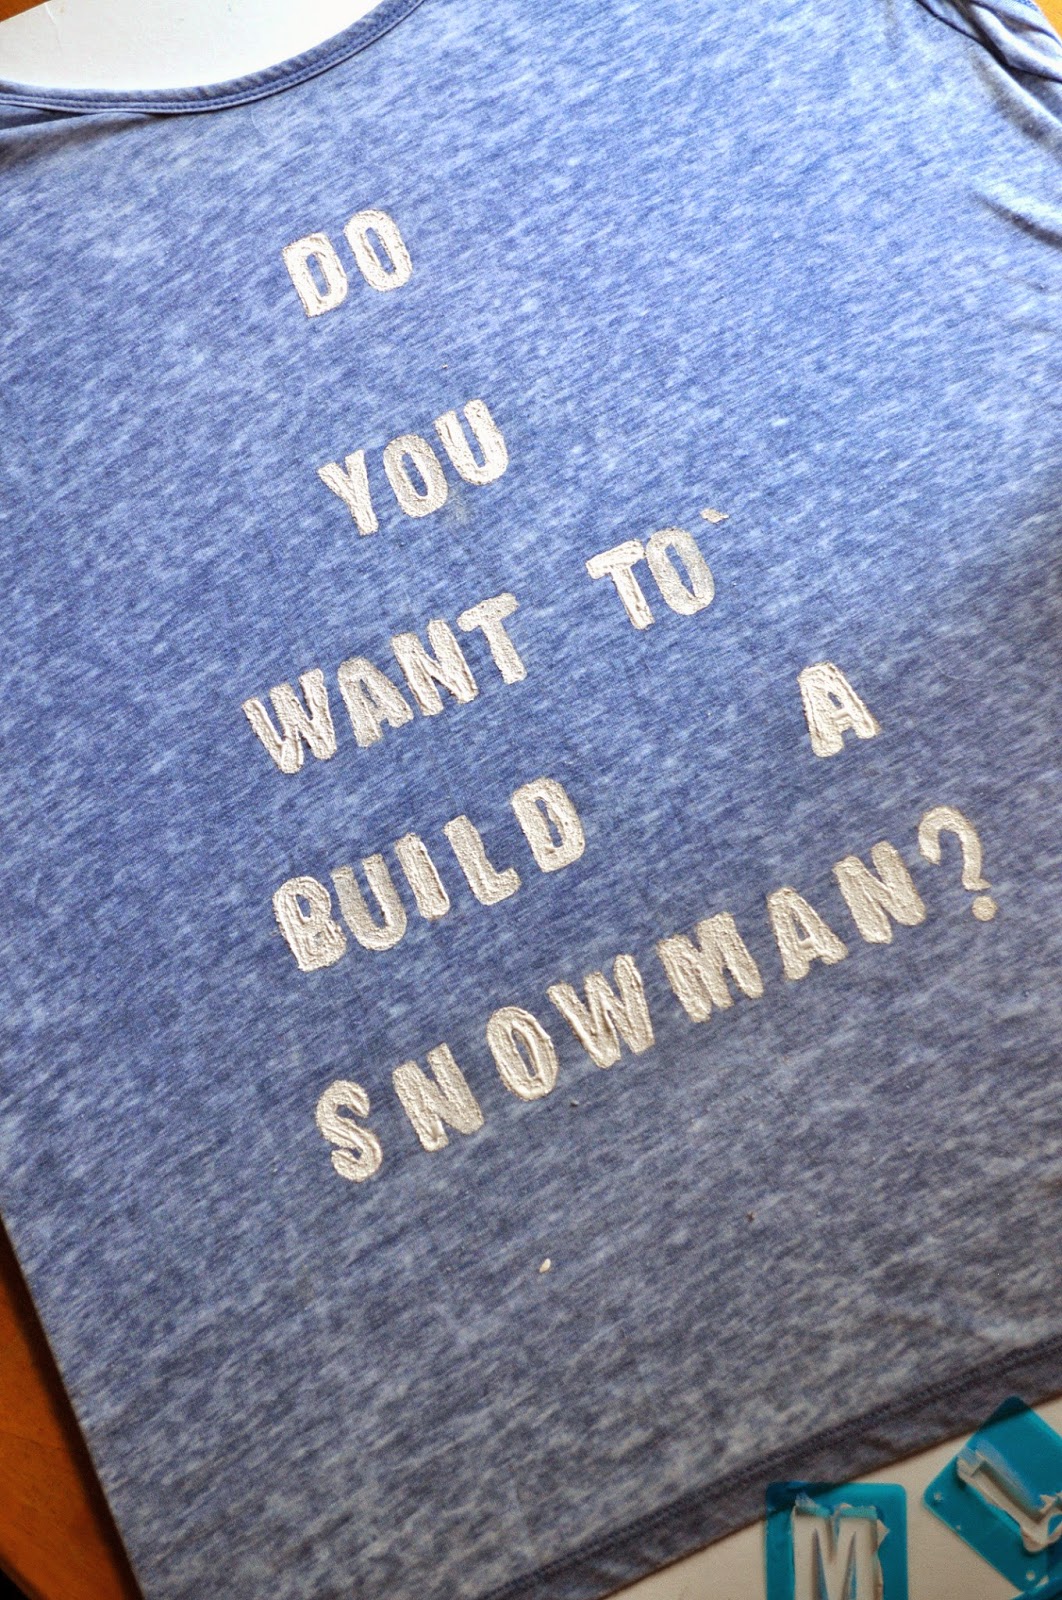
My stencil set also didn't have a question mark, so I free handed that. After I had stenciled all the letters in, I went back in with a thin paint brush and did a second coat, to really make the letters bold. Just an extra touch, not completely necessary. My fabric paint instructions said to let dry for 72 hours, wash while inside out, and it's all good to go. So a few days later, it was ready to wear!
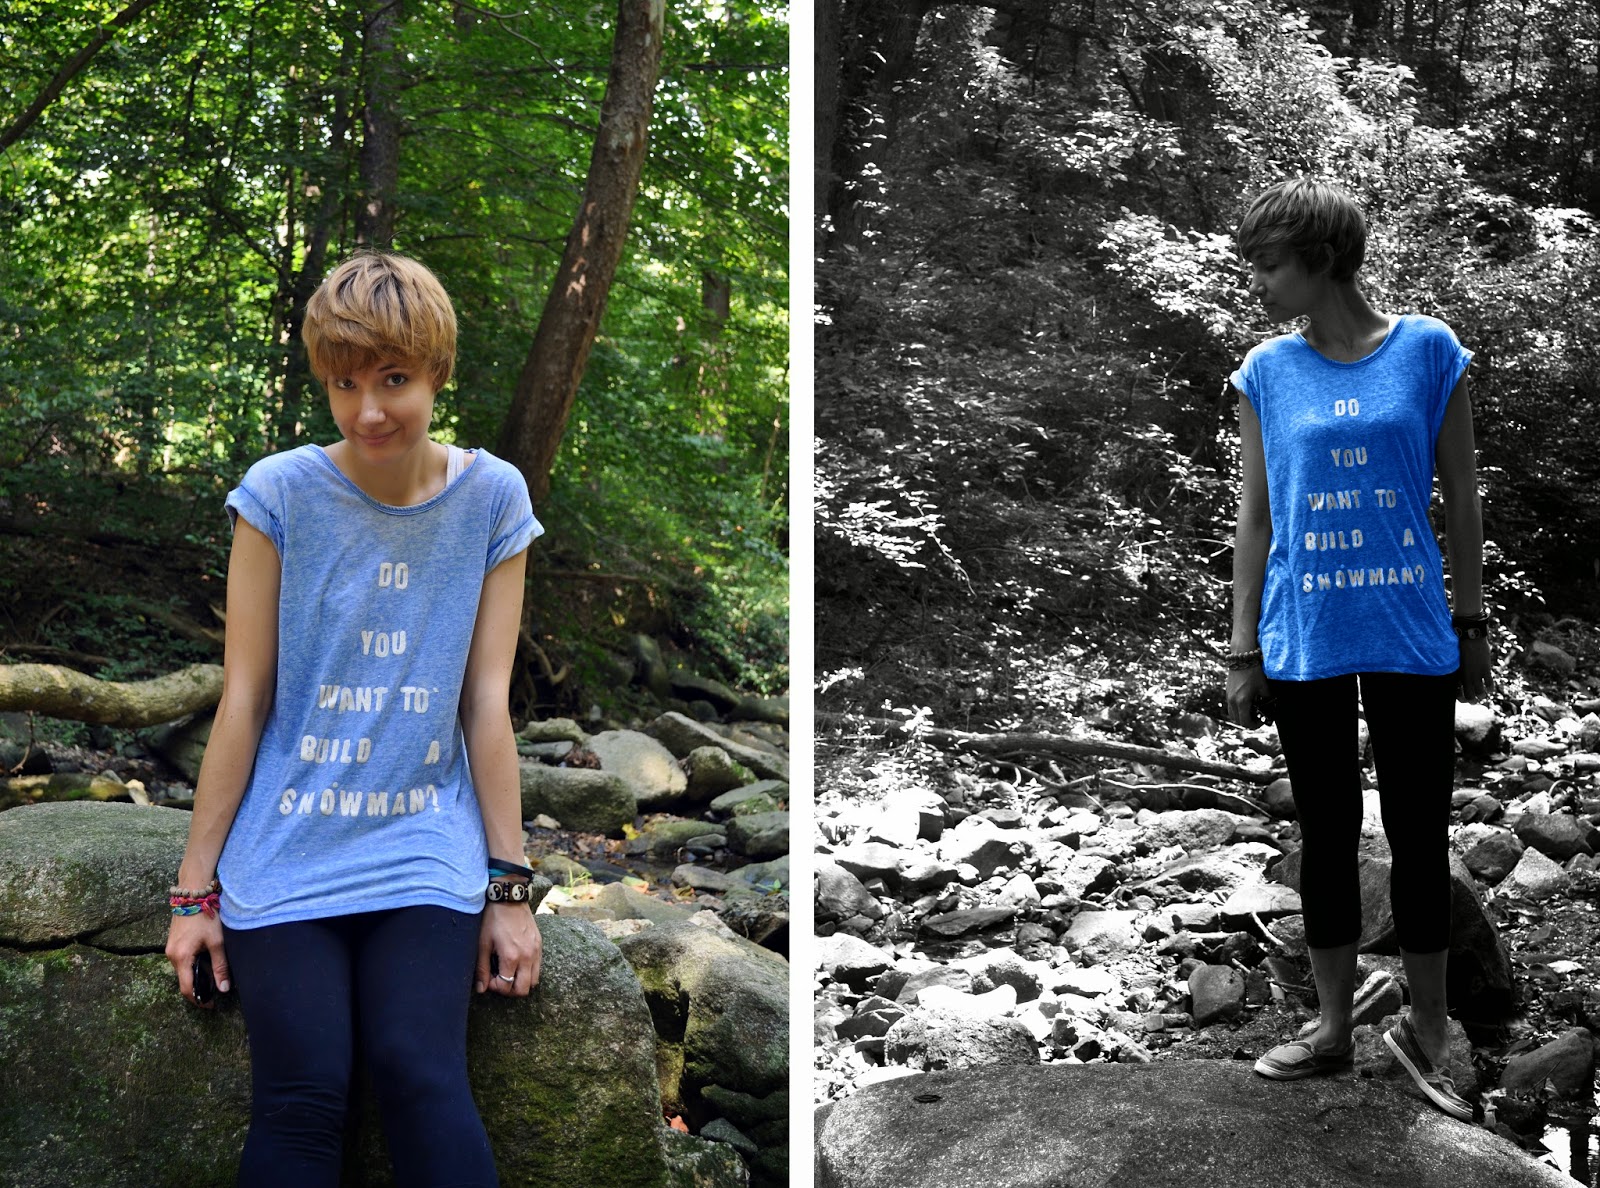
Using iron on letters would have been a lot easier, but I really like the look of fabric paint. So now, if you ever come across a shirt with a phrase you like, but hate the color, layout, etc, just try out making it yourself! On a nice summer day, this shirt didn't really make sense, but in the winter, I'll be sure to get some more use out of it. Next time, I'll have to pick a more versatile phrase, whether a Disney quote or not. :)

No comments:
Post a Comment